iOS Native Video SDK
Latest version: 2.9.4
Installation
VdoFramework supports Swift Package Manager, CocoaPods and static xcframework
Swift Package Manager
Go to Xcode 26.0 or above > File > Add Packages and search the following URL:
https://github.com/VdoCipher/swift-pm-repo
Select 'Up to Next Major Version' in Dependency Rule and set value as '2.9.4'. We will be following semantic versioning for the version numbers.
CocoaPods
Add the pod to your Podfile:
pod 'VdoFramework'
And then run:
pod install
After installing the cocoapod into your project import VdoFramework with
import VdoFramework
Static xcframework
Download VdoFramework-2.9.4.xcframework.zip
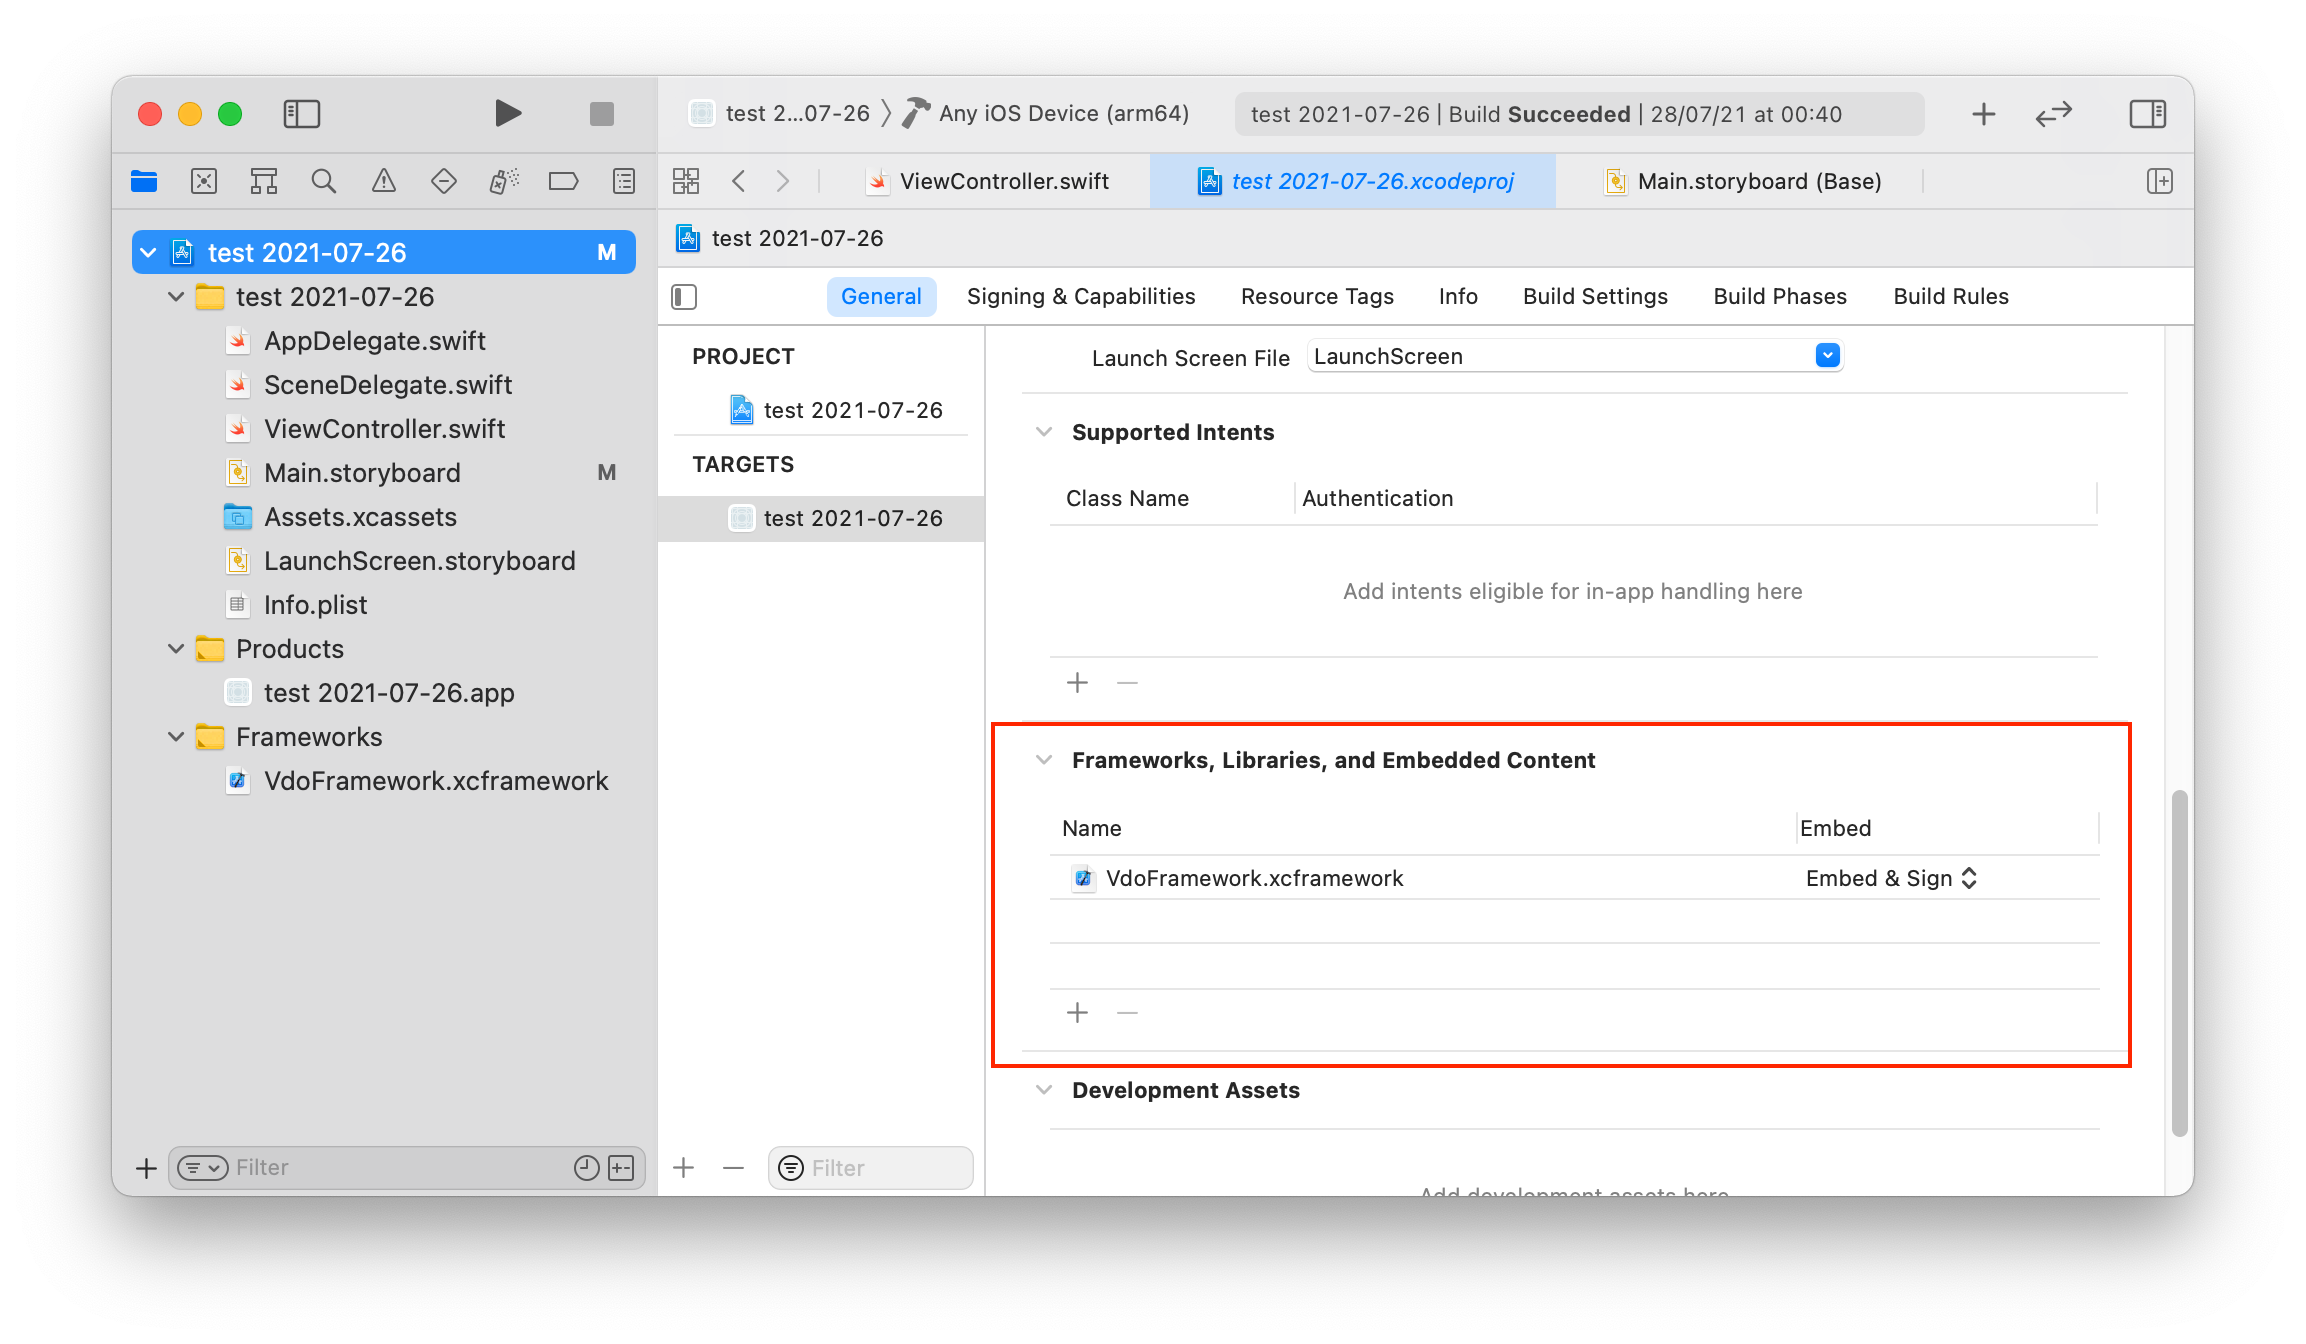
- Download the zip file and open it to get the folder called
VdoFramework.xcframework. - Drag the xcframework folder in the "Frameworks, Libraries and Embedded Content"
- Import the framework in the swift file where you like to use. You will need
AVFoundation.AVKitis only needed when using withAVPlayerViewController - Make sure your application deployment target is 11.2 or newer.
import VdoFramework
import AVFoundation
There are folders named Vdocipher.framework inside but you shouldn't use those directly. Make sure to drag the entire
xcframework folder. Do
not place the framework folder directly in the
file-explorer. This will not work for xcframework.
xcframework?An XCFramework is a distributable binary package created by Xcode that contains variants of a framework or library so that it can be used on multiple platforms (iOS, macOS, tvOS, and watchOS), including Simulator builds.
XCFramework allows to make a single distribution which can work on different swift versions.
Setting up in code
0. Integrating Player View
VdoCipher provides two methods for integrating player into your application:
Integrate Player With UI Controls
You can fetch the player view controller from VdoCipher class,
let vdoPlayerController: UIViewController = VdoCipher.getVdoPlayerViewController()
and present that controller on top of another UIViewController for full screen player view.
self.present(vdoPlayerController, animated: true)
Or you can also push it in the navigation controller stack.
self.navigationController?.pushViewController(vdoPlayerController, animated: true)
This is the fastest and easiest way to integrate the player with controls into your application. This includes a prebuilt UI for the player with ample features and functionality.
Alternative: Player Without UI Controls/ Default Controls
With storyboards, use AVPlayerViewController
for native (default) controls and
AVPlayerLayer for player without native
controls. If you use AVPlayerLayer, then you will need to create your own controls.
For SwiftUI, you can skip to SwiftUI Integration
1. Playback delegate
You need a delegate to listen for player setup events. The methods will be called when switching assets or when the video player is ready to play. This is the only way to get the reference to the AVPlayer. Use this object to do much more with AVPlayer API.
Use the playerReadyToPlay to update your UI or start playing the video.
playerCurrentItemDidChange will be useful when you are creating a playlist,
and the next video gets loaded after a call to playOnline() or playOffline()
methods.
streamLoadError will be useful to identify an error when a playback is initiated.
extension ViewController {
    func streamPlaybackManager(playerReadyToPlay player: AVPlayer) {
        // player is ready to play
        player.play()
    }

    func streamPlaybackManager(playerCurrentItemDidChange player: AVPlayer) {
        /// player current item has changed, use this to set to destination from Step 0, only in case if you are using default `AVPlayerViewController` with default controls for playback.
        playerViewController.player = player
    }

    func streamLoadError(error: VdoError) {
        // Error occured while initiating playback
    }
}
Connect it with your class
// create a delegate for tracking player state
VdoCipher.setPlaybackDelegate(delegate: self)
2. Get otp, playbackInfo & video-id from your backend
Playing vdocipher hosted videos requires these three parameters to authenticate every playback session. Ask the backend to provide the following scheme at the least. The backend application will use this API to get this information.
{
  "otp": "____",
  "playbackInfo": "____",
  "videoId": "_____"
}
You must not implement the OTP generating API call from within the application. Making any API call requires the API secret key. Putting this on the app means that anyone can see your keys. Consider your secret API keys like they are passwords.
3. Create an asset
Create an asset using the video-id
// create a new asset
VdoAsset.createAsset(videoId: videoId) { asset, error in
    if let error = error
    {
        // Remove buffering icon and show error
    }
    else
    {
        self.asset = asset // keep this asset reference for your use
        DispatchQueue.main.async {
        let vdoPlayerController: VdoPlayerViewController = VdoCipher.getVdoPlayerViewController()
        self.present(vdoPlayerController, animated: true)

        /** If using your own custom controls on top of AVPlayerlayer,
        then enable the UI for playing. Remove any buffering icon if showing.
        self.playOnlineButton.isEnabled = true
        */
        }
    }
}
4. Call the playOnline method
Use the asset reference generated in Step 2 to play video online
self.asset.playOnline(otp: otp, playbackInfo: playbackInfo)
Next Steps
The video player should be working fine now. For the next steps, you can implement custom controls if native controls does not meet your needs.
For downloading offline, you can read the docs about offline setup.